Disabling the Command Bar
Occasionally, it is necessary to remove some features and functionality from a Table. For instance, you may wish to prevent someone from deleting an employee from the database. Even if an employee leaves the company, deleting them from your Rapid site can cause further problems.
For instance:
- Any Lookups, Multi-Lookups or Linked Items components will now point to nothing. This will make it difficult to keep track of what projects or responsibilities were assigned to the employee.
- If payroll wishes to contact a previous employee, this will no longer be possible if their item containing their contact details has been deleted.
To mitigate these problems, it is useful to prevent item deletion on important tables, and instead include a Status choice column, where a user can switch an item from Active to Inactive. You can then ensure that a table's main view only shows Active items. This "hides" items from view, rather than "deleting" them.
Below is an outline of the different functionality that can be disabled from a Data Table, and why each of these choices might be useful.
Navigating to the Data Table Configuration Panel
- Open your desired Table in Designer. This can be achieved by:
- Opening the Table in Explorer, and then pressing the Designer button in the Jumbotron
- Opening Designer via the Sidebar button, opening the table via the Tables List, and then clicking the Design tab. Ensure that the drop-down choice field beside the Save button is a plural (i.e. it should say "Employees" not "Employee").
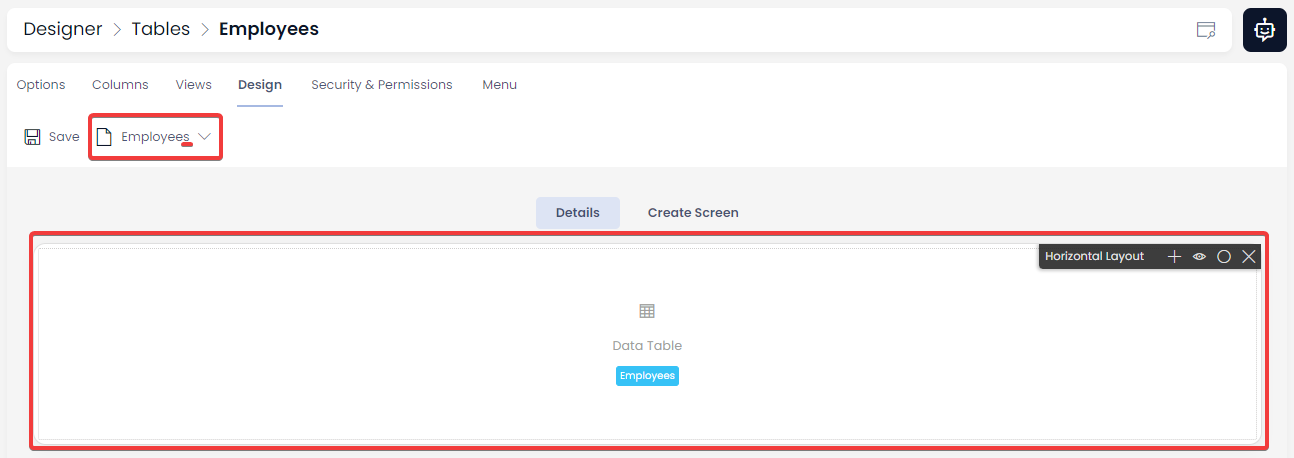
- You should now be able to see the Data Table as a page component.
- Hover your cursor over the Data Table page component, so the Data Table overlay appears.

-
Click on the Configure button (it has an icon of a pencil).
-
This will open a side panel, where the Data Table's Command Bar can have certain features disabled.
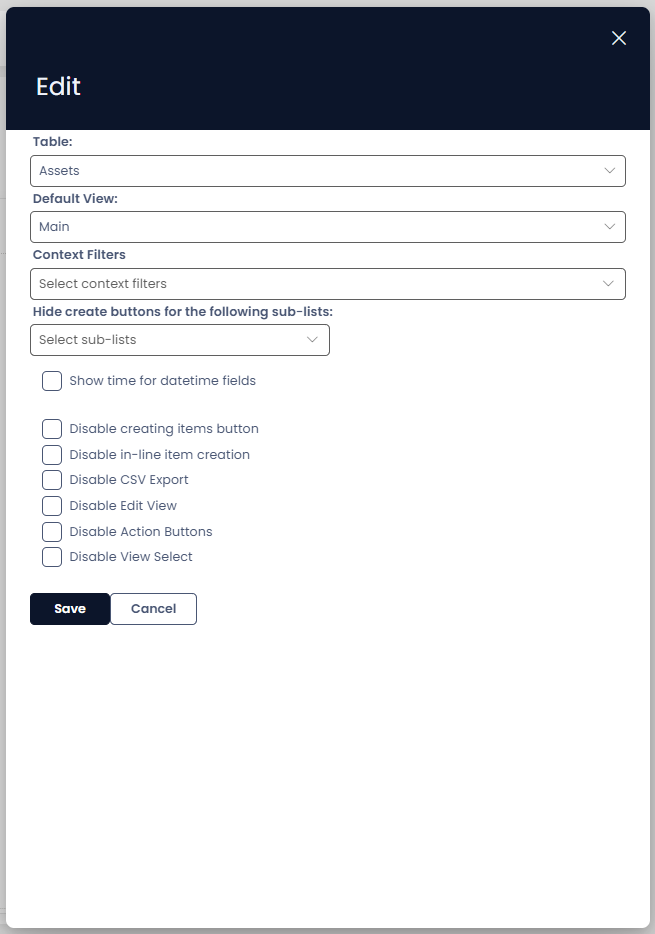
Here, you can see the following fields:
| Field | Description |
|---|---|
| Table | This is the Rapid database table that the component will display. |
| Default View | Here you can set a view that the table will use as its default. |
| Context Filters | This field allows you to enable any Lookup or Choice fields on the table, to be used as live filters on the table componant |
| Hide create buttons | Here you can define any subtypes for this table, to be excluded from the 'create new' area on the command bar |
| Show time for datetime fields | Here you can set datetime fields to display the time componant on a table |
| Disable Creating Items Button | This will hide Create button on the table, so that no new items can be created. |
| Disable in-line item creation | Toggling this will disable the ability to create new items in line, on the table |
| Disable CSV Export | This will prevent users from downloading the table data as a CSV file |
| Disable Edit View | This disables users from being able to make edits to the current view. |
| Disable Action Buttons | This hides and disables any menu items that might trigger workflows, trigger webhooks, etc. |
| Disable View Select | This prevents users from changing the view to an alternative view. |
Note that any changes to the functionality of a Data Table's Command Bar will only affect that particular instance of the Command Bar. For example, if there was another Data Table that pointed to the Employees Table, it will have its own seperate configuration for the Command Bar.
By default, all of the above functionality is enabled.
Disabling Delete
- Open the Table in Designer.
- Open the Options tab for the Table.
- Click the checkbox that reads "Disable Delete Buttons"
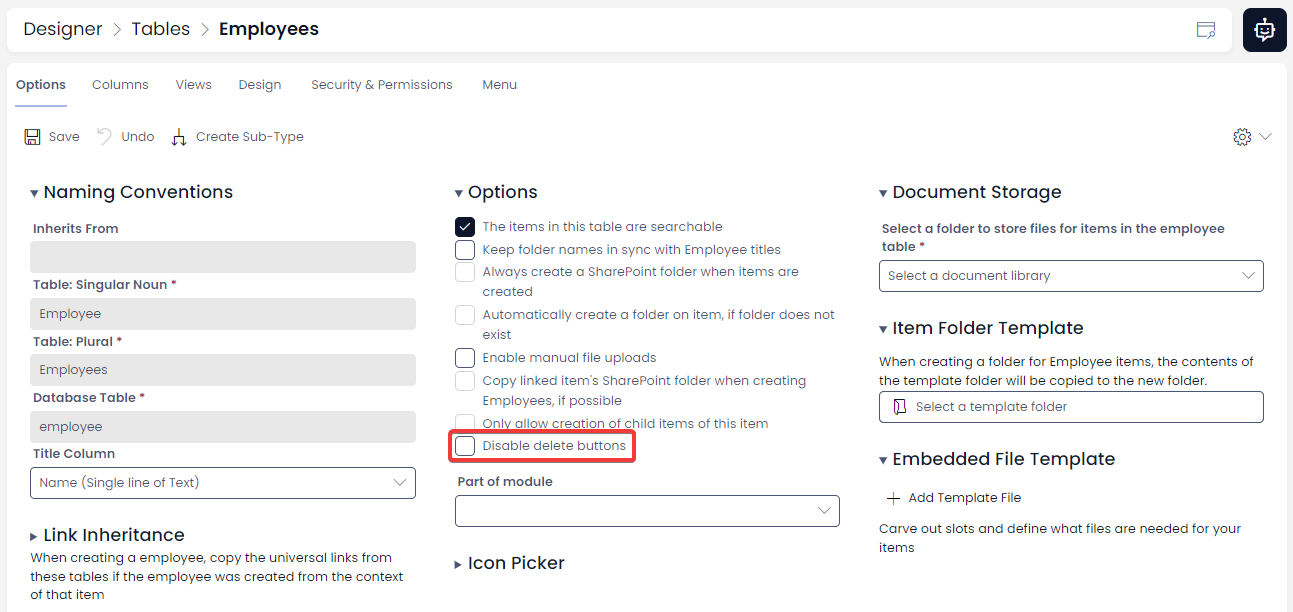
Unlike the options mentioned above, disabling the Delete button in the Command Bar will disable it across all instances of the Data Table. It will also disable the delete button so that it cannot be access from the page of any item that belongs to the table.
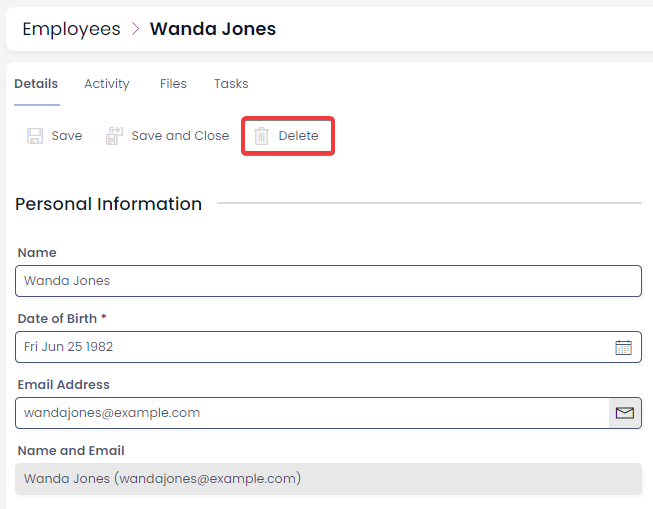
The Delete button is now greyed out, and cannot be used.